Thursday, February 27, 2014

Project365 - Auto Strobism

Introduction
I have started following a blog which gives an introductory course to Strobism - the advanced use of various types of lights and light modifiers in photography. I started with a course called "Lighting 101". It is a fantastic resource for amateur photographers who want to sharpen their skills with lighting various situations.
In the course of my reading, I came across a challenging situation, in which the author was attempting to light a helicopter mid-flight ! While I haven't got a helicopter of my own to photograph, I thought I would attempt to duplicate the technique.
The Setup
My trusty Canon 60D was mated with the general-purpose Canon 24-105mm f/4 L lens & mounted on the Manfrotto tripod. The flash was mounted with the Cactus v5 remote trigger, so that it could be mounted off-camera.

This nifty little DIY mod is called a "lightbulb". The idea is that the sour cream container acts as a diffuser, and the light is thrown in all directions. In practice, it works very well, and I will likely keep this little mod in my kit.


The Photos
Here is the basic setup: the "lightbulb" is placed inside the car between the front seats, and when triggered will light the car from inside. As you can see, I substituted Pat's car in the dark garage for the helicopter in the night sky.


This is a step towards the end product - you can see the desired effect. You can ALSO see the lightbulb peeking up above the dash !


I couldn't decide how to set up the shot with only one flash. So I also tried it in the back seat, to see how it looked. I don't like it as well, as the front seats are in deep shadow and you can't see anything but the silhouette of the fuzzy dice. In the perfect world, I'd like to shoot this with two flashes, one in the front, and one in the back.


Here is the final photograph, with the desired effect. Overall, I'm pleased with the effect, although one day I'll re-shoot it with a second flash.


Lessons Learned
Photography is really the craft of manipulating light. I thoroughly enjoyed this shoot, as it is an interesting & creative way to experiment with light. I might later try to reuse the technique, but with more light sources, and even models in the cabin.

Tuesday, February 25, 2014

Project365 - Get Out of the Way !

Introduction
While experimenting with Depth of Field, in a previous post, Pat suggested that using a fork on a plate might be a bit boring ! Instead, she handed me her David Yarmin ring to shoot. It's beautiful, to begin with, but has lots of interesting details - the facets of the stone, the twists in the ring itself, and the detail around the stone.

The Setup

Of course, the camera body was my Canon 60D, and I mounted it on a Manfrotto tripod. Next I mounted the Canon 40mm f/2.8 prime lens, and a 20mm extension tube because my subject was small, and wanted it to fill the frame. Next, I mounted my Canon 430EX II flash with the Cactus v5 triggers on a second tripod, and affixed a 8" snoot to focus the light very tightly. The flash was set to 1/64 power, and a 108mm beam.

The Photos

Oops ! See the orange tinge in the stone and the setting ? That's a reflection off of my t-shirt ! I only noticed it after I started processing the photos. This will never do...


This one is better. But if you look carefully at the bottom right of the stone, you can see my shadow outlined ! Sigh - another decent photo ruined by an accidental reflection. Next !


This picture is pleasing to the eye - no reflections, nice Depth of field, and an interesting composition. I also like how the facets of the cut stone show up, and the position of the flash helps draw out the detail of the mount.


Lessons Learned

As the first two photos illustrate, I must remember to get OUT of my own photos ! Being aware of one's surroundings, and how they might affect the photograph, are of paramount importance to the budding photographer.


Project365 - Depth of Field

Introduction
In a previous post, I remarked that there IS such a thing as too much Depth of Field (DoF). I thought it detracted to the composition of the photographs. But then I wondered if I could turn that detraction into an advantage. To me, it seemed to be a good thing to experiment with ! So tonight's Project365 entry is about my experiments with Depth of Field.

The Setup

This was a little bit more complex. Of course, the camera body was my Canon 60D, and I mounted it on a Manfrotto tripod. Next I mated the camera body with my Canon 40mm f/2.8 prime lens, and used a 20mm extension tube. My subject was tiny, and wanted it to fill the frame. Next, I mounted my Canon 430EX II flash with the Cactus v5 triggers on a second tripod, and affixed a 8" snoot to focus the light very tightly. The flash was set to 1/64 power, and a 108mm beam.

The Photos

I shot a great number of test shots, attempting to dial in the settings. These are a sampling of some of the more interesting ones.

Here is one of the early photos of the set. You'll note how shallow the DoF is - not even the length of the tines of the fork ! I like the overall effect, but not the lighting or the background.


I turned the fork over, hoping to achieve a more interesting look. The farthest tine is sharply in focus, while the nearest is blurry. I still don't like the background !


THIS is more the effect I was hoping for ! The ends of the tines are in focus, and by placing the fork on a white plate, the background loses importance. Best, the blurriness increases as the eye travels down the tines.


Lessons Learned

After about two dozen shots, I started to achieve the look I was after. But it proved that I can use Depth of Field as an artistic part of the composition. Something I wouldn't have understood yesterday !


Sunday, February 23, 2014

Project365 - More Colour, Please !

Introduction
In my previous post, I was shooting Pat's tulips utilizing the abundant natural light from our bay windows, and augmenting the photos with some fill lighting - namely my off-camera flash. While the photos were technically accurate, and turned out nicely, Pat suggested they showed too much green, and not enough of the tulips's colour. So here is take two...

The Setup

I decided that I wanted to get closer, so that the blooms filled the frame. Similar to macro photography, I wanted to capture as much of the colour of the blooms as possible. So I outfitted my Canon 60D with my Canon 40mm f/2.8 Prime lens, and augmented it with 12mm extension tube. I shot handheld, so I could move around the vase at will, and used the ambient light as my only source. I started with the aperture wide open, and the ISO at 500, to create a very blurry background, and still allow me to dial up the shutter speed so as to eliminate camera shake.

The Photos

I love the way the open aperture creates a nice, blurry background, so the eye focuses on the bloom. I even managed a little bokeh in the background !


The soft lighting from the windows makes the delicate pink blooms appear to glow.


This photo underscores the issue of having the aperture setting too wide open. The depth of field is so narrow that the petals appear to be soft & blurry as well. Probably should have opened up a little to say f4 or f5.6


Lessons Learned

There IS such a thing as too narrow a depth of field. It made the shots a little fuzzier than I wanted. While I achieved my goal of creating much more colourful photos of the tulips for Pat, I am not overly pleased with the output. But that's why this project exists - to build experience and practice my craft !


Project365 - Easing Back Into It...

Introduction
OK, OK... I know it's been too long. My eye infection really bothered me for about a week & was really affecting my vision. But enough is enough ! Time to get back on track. So without further ado...

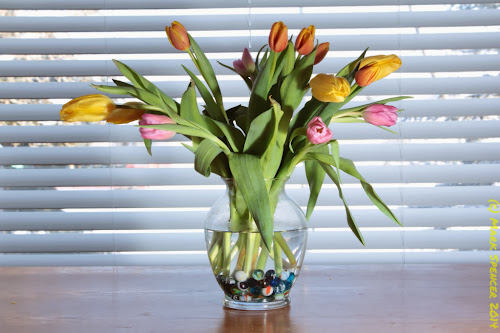
Pat really loves tulips. Since we are able to get cut tulips relatively I expensively, we have agreed that they make a nice addition to our table. And since it's too darn cold outside to shoot, it's time to practice some strobism. You know, using my flash to provide extra lighting ?

The Setup

The table has excellent lighting, owing to the bay windows. It's a bright sunny day out, and we often have to close the blinds partway to keep from getting overwhelmed by the sunlight ! I know, nice problem to have... So this shoot has the vase about two feet in front of the partially-closed blinds. From there, I set up my Canon 60D on a Manfrotto tripod, with the trusty 25-105mm f/4 L lens. I also used the Cacyus v5 transmitters to take the Canon 430EX flash off the body. I wanted to experiment with different lighting strengths & positions.

The Photos

I took about 25 photos. They have the flash in various positions, and in varying strengths. Like the camera, I operate my flash in fully manual mode as well.

This first image was the test-shot. I set my aperture, ISO & shutter speed to create a "perfect exposure. As you can see, the lighting from the window is beautifully exposed, but the flowers & vase are dark. We need a "fill" light.


The second image has too much flash ! Set at 1/8 power, the flash is overwhelming the shot, creating harsh shadows in the leaves.


In the third shot, I have dialled back the flash to 1/16th, which is better, but still a little strong for my tastes.


This fourth shot has the powers knocked back to 1/32 strength, but I also moved the placement of the flash. The colours are still nice & bright, without overwhelming the scene.


In this final shot, I moved the flash further away, dialled it back up to 1/16 power, and have it at almost 90 degrees (on the left side) of the flowers. I think the lighting is OK, but not nearly as dramatic as the fourth shot.


Lessons Learned

I have a lot to learn about studio shooting. And this was shot with only two light sources - the ambient light from the windows and a fill flash. In the future, I'd like to pick up another flash to do multi-plane lighting. I also kept the setup really simple - no reflectors or other mods. About the only mod used was a diffuser on my flash to soften the fill lighting, which I included after the second shot.


Saturday, February 15, 2014

Project365 - Long Exposures

Introduction
This is my first blog back, since my eye infection. I felt I was taking too long, and didn't want anyone to think I had abandoned the project. I haven't, but I also didn't shoot today. So this entry is based on some of my earlier work.
In this series, I experiment with long exposures. With only one exception, the photographs were shot at a shutter speed of 30 seconds. This allows a LOT of light onto the sensor, which creates some remarkable images. But that also poses challenges, as the photographer must contend with trying to create great images, while only adjusting ISO and aperture. I shot a lot of photos that night, and these will hopefully represent those challenges & some success.
The Setup
I wa shooting my then-new Canon 60D. It had the venerable 24-105mm f/4 L series lens, and because of the length of the exposures, I mounted the camera on my tripod & used my cable-release to trigger the shutter. The shoot was held at Bridgeland Station, on the Calgary LRT line. It has pedestrian bridges that cross over Memorial Drive, as well as an unconstructed view of the downtown core.
The Photos
This is the first photo. It was shot at f/9, ISO 100 and 30 seconds. The lights on the building pop, but the foreground is kind of eerie looking. It also looks a little blurry, but that's what photographers call "noise".


Here is the exact same shot, only at 15 seconds.the image looks less noisy & loses the eerie glow.


Here is the shot I like best. I went back to a 30 second exposure, but dialled back the aperture to f/13. The lights still pop, the buildings are still sharp, and the colours look the most natural to me.

I shot these next two the same night. Due to the fact the shutter was open for 30 seconds, you don't see the cars themselves, but they leave long red streaks where the tail-lights glowed. I also love how the lens filter created remarkable star bursts around the street lights !


Here we are facing the oncoming traffic. The train is more visible, as it stayed in the station for the back half of the shot. But you can still see the lines of the headlights. Gotta admit, I like the effects created by long night exposures.


Lessons Learned
I like night photography. Long exposures allows the sensor to collect a lot of detail, as well as creating cool effects with the lights on the moving cars. Perhaps later this year (when it's a little warmer !), I'll experiment with long-exposure still photography & see how that turns out.
Thanks for sticking around ! There's lots more to come, now that my vision is coming back...


Wednesday, February 12, 2014

Project365 - On a Brief Hiatus !

Seems I have somehow gotten an infection in my left cornea. It's left me with blurred vision & light sensitivity. I am taking drops every hour for 24 hours, then back to the eye doctor. I won't be shooting too much right away, although I may use the opportunity to go back over previous pictures. Hopefully, this won't last long !

Until I get back, take a moment to cruise over to YouTube and search for "Simon's Cat" - I think he's hysterical !


Mark

Project365 - The Golden Hour

Introduction
Photographers will try to explain that their craft is light. Without light, human beings cannot "see". So in order to best show off their work, photographers will work with and manipulate light to show off their subject in a flattering way. Sometimes that's easier said than done. During the winter, for example, the sun is low & the days are short. Our skies are grey and overcast.

It is a long-preserved tenet in photography that the hour immediately after daybreak, and immediately before sunset are the so-called "golden hours" of photography. The sun is typically bright, while being low on the horizon. This helps with creating dramatic effects such as silhouettes and romantic, softly-lit scenes. To say the least, the light can be very flattering.

The Setup

I travel with my trusty Canon 60D, and it is almost always equipped with the Canon 24-105mm f/4 L series lens. This is effectively my default setup.

These photos were shot handheld, which implied that I needed to balance shutter speed with ISO. If the ISO is too high, the photos appear grainy - what photographers call "noise". If the shutter is open for too long, I ran the risk of camera shake causing blurry photos. And I had the aperture set fairly closed, as I wanted the entire field in focus. Finally, the white-balance was set to "shady" in the beginning, and later to "flash".

The Photos

In this example, the photo seems flat, almost monochromatic. While I tried to use perspective to make the photo visually interesting, the lighting wasn't really so great.


We see approximately the same effect in this photo. The photo seems boring, almost lifeless. These images were taken around 4PM, about two hours before the sun started to set.


This photo is better, as the lights on the tower are starting to glow, creating a little bit more contrast & therefore a bit of drama. However the hotel behind still seems drab. I do like the warm glow of the streetlamps in the foreground.


The same can be seen in this photo of the Belaggio hotel. The building lighting is starting to show up. These photos were taken around 6:15 PM, as the sun was beginning to set.


This photo, a shameless "I was there" tourist shot, really shows off the tower. The lights create a beautiful, dramatic effect, while the sky is still light enough to provide a beautiful background.

Note: in order to get my girlfriend to not be a silhouette, I was forced to use my on-board flash. Hence the lighting appears harsh, and badly reflected off her glasses. :-(


Here is a great example of the "golden hour". The sky creates a beautiful blue backdrop, while the external lighting of the building creates accent-points and contrast on the building itself. It is light enough to make out the details at the base of the hotel, and dark enough to allow the accent lighting to glow beautifully.


Lessons Learned

I have said previously that I love shooting in Las Vegas. Both the sunrise & sunset create opportunities to take advantage of the Golden Hour of photography. Couple that with clear skies and bright lights, and it becomes a fantastic place to shoot dramatic skyline photos.


Monday, February 10, 2014

Project365 - Street Photography

Introduction

I travel to Las Vegas at least once a year. I love the glamour and the bright lights. It's simply a photographer's paradise to shoot at night ! But when the sun is shining, the same glitz looks a little bit shabby. Many parts of the infamous Las Vegas Strip are downright seedy !

I am learning about Street Photography. While there is no prescriptive definition of the term, the very best examples depict real people in real situations. Often, their faces are wrought with raw emotion. Admittedly, I am not very good at it.

The Setup

Truth be told, this was a spur of the moment, "out the car window" shot ! I used my Canon 60D handheld, with my "general purpose" Canon 24-105mm f/4 L series lens. Back button focus was extremely helpful in getting this shot !

The Photo

When I first took the shot, I was looking at the man and his dog. I was interested by the expression on the man's face & and the state of his dog. Frankly, I never noticed the OTHER homeless man, huddled beside the railing ! When I compare the two, it makes me realize that homelessness has many faces.
Lessons Learned
This photo was not so much about technique or even composition. It's about learning to "see" the environment, and capturing it faithfully. While I was unable to capture the other man's face, mostly because I never saw it, you can still feel an element of desperation in his body language.


Project365 - Landscape Photography

Introduction
I have a friend, Derrell, who is a very good photographer. What I like most is his work in landscapes. Being an avid hiker, Derrell spends a lot of time in the back-country of the Canadian Rockies. You can find some fabulous examples of his work here. Personally, I don't think I have the "eye" for it like he does, but I still try to make technically good and visually interesting photographs.
The Setup
We were driving up to Red Rock Canyon, about 18 miles outside of Las Vegas, and it seemed like it would be a straightforward shoot. I mean, it's not like the subject is going to move or run away, so I could take all the time I needed, right ? =D
Camera - my trusty Canon 60D, lens - my "general purpose" 24-105mm f/4 L series zoom
The Photos
The road to Red Rock Canyon appears desolate in this photo. In fact, I was lucky that there just happened to be no cars going past at this time. The road helped create leading lines to direct the viewers eye from the foreground to the back.

These are the famous red rocks the canyon is named for. I'm quite sure a quick Google search would illustrate a high level of iron oxide in the rocks.


The gradient lines of the landscape from near to far are what captured my eye in this and the preceding photograph. The desert gives way to the foothills, which in turn give way to the mountains before reaching for the bright blue sky. It was shot at f/22, all areas are equally in focus.


Lessons Learned
I need to spend more time on this particular form of photography. While I can compose nice photos and create technically "true" representations, I don't feel very excited about my abilities in this genre. Oh, and please remember to give Derell's Facebook site a "like" if you enjoyed his work.

Project365 - How Shutter Speed Interacts with Ambient Light

Introduction
Shooting at night can be challenging. Often, the photographer is dealing with different kinds of lighting. Sometimes, there is very little light reflecting off the subject. Sometimes, the photographer adds light to the subject from an external source, such as a flash. And sometimes, the subject of the photo is a source of light itself. These all create challenges for the photographer to overcome.
The Setup
Camera - Canon 60D, lens - Canon 24-105mm f/4
We were walking around Las Vegas, and while I had scouted the shoot, I hadn't planned to run it when I did. Hence, I was a little unprepared. But since we were in the right place, at the right time - may as well make the best of it ! So I shot handheld, using a railing to steady the camera.
The Photos
In this photo, the image is very dark. We can see the fountains clearly enough, but we can really only see the spotlights on the building behind. It was shot at f/4, 1/500th of a second. Further, the lights under the fountains are the only appreciable light source.


This photo is better, having been shot at f/4, but at 1/200th of a second. You can start to make out the details of the building in the reflected lights of the fountains.


Finally, this image is the best, shot at 1/125. This small increment of shutter speed allows a little more light to get onto the sensor, while still being quick enough to still negate any camera shake.


Lessons Learned
You will notice that I had three nearly-identical images to demonstrate the effects of shutter speed relative to the ambient light. This was not done because I was mindful of writing this blog. The fact is that I was experimenting with my shutter speed to achieve the results I wanted. I do a LOT of learning by trial and error. The beautiful thing about digital photography is that I can experiment to my heart's content, without having to incur any incremental "costs" !

Project365 - Shooting at Dusk

Introduction

I love shooting in Las Vegas. All of the bright lights & glitz make for some colourful photographs ! But in order to capture the bright lights, you need to shoot at night. But what if you want the best of both worlds ? I want to see the building as well as the lights ! So what to do ? Why, shoot at dawn or dusk, when there is some ambient light from the sun...
Shooting at dawn or dusk brings it's own issues. A photographer needs to constantly re-evaluate his settings with rapidly-changing lighting situations. The sun rises and sets quickly ! In turn, the photographer must also work quickly, while keeping an eye on the changing conditions.


The Setup

Camera - Canon 60D, lens - Canon 24-105mm f/4

We were walking around Las Vegas, and while I had scouted the shoot, I hadn't planned to run it when I did. Hence, I was a little unprepared. In the perfect world, I might have used my tripod & maybe even used a flash for some infill lighting. But we were in the right place, at the right time - make the best of it !

The Photos

Here is a pre-dusk photo of the Belaggio Resort & Casino. Since it wasn't yet dark enough, we had decent detail of the building, but the lights didn't really "pop". The image looks a little drab and dull. Based on the EXIF data, this photo was captured at 6:22 PM.


Now, compare the previous photo to this one, which was captured at 6:43 PM. What a difference 21 minutes makes ! If you take a look at the sky in both photos, you'll see an appreciable difference.


This photo was taken almost ten minutes earlier. You would think it should be brighter. The difference is that I had the ISO set to 1000. In the previous image, the ISO was at 3200, which helps make the image seem much brighter.


Lessons Learned

This set of photos, which are part of a larger set of about 50, demonstrate how quickly the lighting changes, even over the course of 30 minutes. An astute photographer needs to be constantly checking the conditions and evaluating his settings to achieve the artistic goals of the shoot.


Saturday, February 8, 2014

Project365 - Experiments in Shutter Speed

Introduction
Pat & I are in Las Vegas this week, escaping the icy cold of winter in Calgary. It's a beautiful place, and I am taking literally hundreds of pictures. So I thought I'd take a minute and share a fun little technique I learned, which illustrates how your shutter speed affects your overall photograph.
The Setup
Today, nothing fancy. My canon 60D, handheld, with my general-purpose 24-105mm f/4 L series lens. Enough gear to be good for walking around, doing a little "street photography".
The Photos
This first photo has the shutter speed around 1/125th of a second. The water appears to be frozen in time. Chunky & droppy...


Here in this second image, the shutter is left open for just a little longer, at 1/8 of a second. See how silky & smooth the flowing water looks ?


Lessons Learned
Admittedly, in order to change the shutter speed to change the "feel" of the photos, I also had to manipulate the Aperture. These two combined, along with ISO, create the "golden triangle" of perfect exposures. By slowing down the shutter, more water flows past, making the water look silken. Speed it up, and the water looks choppy.

Thursday, February 6, 2014

Project365 - Street Photography

Introduction
Street photography is an art-form all in itself. The images tend to be very raw, often depicting human emotions in a very intimate way. For the record, I have ZERO experience with it. Perhaps our trip to Las Vegas will present me with opportunities to try my hand at it.


The Setup

The objective is to be as I obtrusive as possible. So no tripods, no flash, no huge lenses. But you do need a zoom of some form. This is not the venue for portrait photography !

Camera - Canon 60D, Lens - Canon 24-105mm f/4 L

The Photos

Whoops ! Forgot to set the white balance correctly. But if you look at the man on the left's body language, he is clearly impatient to get his morning cup of joe.


This photo worked out well ! I wanted to capture & convey how Dad is still, while the kids are in near-constant motion. I had to lower the shutter speed to about 1/5 of a second to achieve this look.


This solitary travellers surrounded by empty chairs. I like the look, even though he is not really doing anything particularly interesting. I might have messed around with the depth of field, but Ias more concerned with not getting caught taking his picture !


Lessons Learned

I need to research and practise this area of photography better. This was a reasonable first attempt, although I need to get in front of the subjects, in order to capture the raw expressions. I might also shoot them in monochrome, to highlight the contrasts rather than the colors.


Tuesday, February 4, 2014

Project365 - all Prime, All the Time !

Introduction

Pat cleaned out the fish tank (aka Freddie & Mercury's home) today. The water is crystal clear, and I wanted to re-visit shooting the guys. The first attempt was pretty good, but there was a lot of crud floating about in the water. I have also been reading a lot of discussion forums where the "Pros" talk about only shooting with prime lenses. Prime lenses have no zoom capabilities - when describing lenses, they give a range 24-105mm for example. A prime lens only has one number, like my 40mm lens.

The Setup

Camera - my Canon 60D, lens - the "Shorty McForty" a Canon 40mm f/2.8, flash - Canon 430EX II, trigger - Cactus v5

The flash is off-camera, so I can move around without moving the light. Which is important, because with a prime lens, you zoom with your feet !

The Photos

While this photo is slightly over-exposed, it shows how translucent Mercury's body really is. You can clearly make out the veins in his arms & legs !


Here, the strobe is indirect, so Freddie's head is in shadow. But the detail of his scales & fins is remarkable !


Lessons Learned

I keep forgetting that my prime has a nice wide Aperture of f/2.8 ! It is a very bright lens, allowing lots of light onto the sensor. I must remember to shoot with it more, as I get nice crisp photos with it.


Sunday, February 2, 2014

Project365 - testing IFTTT

I am trying to simplify my workflow. Every time I post to blogger.com, I then copy the URL to Facebook, LinkedIn & Twitter. I want to see if IFTTT can accurately take those posts & send them to the correct accounts.


This is a test. This is only a test. There is nothing to be alarmed about !


Thanks for your patience,


Mark

Saturday, February 1, 2014

Project365 - Freddie & Mercury

Introduction
I saw some works of a fellow who had taken some stunning images of Betta fish (sometimes called a Siamese Fighting Fish). Since we have a Betta and a Dwarf African Frog (Freddie & Mercury), I though I would see what I could come up with.


The Setup

Camera - Canon 60D, Lens - Canon 24-105mm f/4 L series, Flash - Canon 430EX II, Transmitter - Cactus V5

The shoot had a coupe of challenges. First the fish tank is a tall cylinder of glass, so the light bends tremendously ! Second, the glass is highly polished, making it very reflective, so I had to be careful with where I could place the remote flash.

The Photos

The tank, bathed in reflected light from behind. Freddie is foraging for food at the bottom of the tank.


Mercury lazing at the bottom of the tank. I'm quite sure he didn't know what to make of the flash.


While Freddie is facing away from the camera, I'm impressed by the detail in the tail fins.


Freddie, seen from above. His scales are luminous in the light !


Lessons Learned

The challenge with this shoot was in the lighting. I couldn't place the flash too far to one side or the other, as it would simply refract into the camera lens. Also, the subject do NOT take instruction well, so it became an exercise in patience. The bonus idea was to feed them, which made them a little more animated.