Sunday, March 30, 2014

Project365 - Second Curtain Flash

Introduction
The kids are over for the weekend, but the continual snow has everybody a little down. So what better to lift everybody's mood than a little RC Car racing ? Since the cars move on a set track, it's pretty straightforward to capture some of the action. It's also a great opportunity to try a new technique called Second Curtain Flash.

The idea is that under normal conditions the flash fires as the shutter opens, freezing the action. Then, depending on the shutter speed, the shutter closes again, finishing the shot. Second Curtain Shutter delays the flash until the shutter is about to close. So in slightly longer exposure shots, the effect is to capture some blur of movement, and then freeze the action with the flash.

The Setup

My trusty Canon 60D, with the venerable 24-105mm f/4 L lens. The Canon 430EX II flash is mounted on the hotshoe, and set to ETTL and Second Curtain Flash. In order to get the blur, the shutter was set to 1/4 second, aperture at f8, and the ISO at 125. I shot handheld, as I was down on the floor, on my belly to achieve the look I wanted.

The Photos

A little racing action sees the grey car passing the yellow car. The blue streaks are actually the Bluetooth indicator lights on top of the cars.


I really like how the yellow car blurs brightly. You get such a sense of speed from this effect !


Taken a little bit wider, both cars are in the frame. Unfortunately, there's not much contrast between the grey car's "blur" and the dark background. So it's not as good as I had hoped.


Lessons Learned

This was a quick little shoot - only a dozen or so photos. I like the effect, but have come to realize that it works best when you have high contrast between the background and the subject.


Wednesday, March 26, 2014

Project365 - Let's Go For a Drive !

Introduction
I have been thinking about this shoot for a while. I wanted to play with motion, but instead of having the subject crisp & everything else blurry - ala Bokeh - I wanted to capture the feeling of being in motion. After shooting the Auto Strobism shoot, I liked the setup in the car. And this gave me the idea for the shoot !


The Setup

This was a lot more of a complex setup than I expected. The idea was to mount the camera (Canon 60D), on the Manfrotto tripod in the back seat of the truck. In order to capture the entire windshield, as well as the occupants of the front seat, I switched to the Canon17-40mm f/4 wide-angle lens, and kept it at 17mm. I was worried about the stability of it all, so I looped the neck strap of the camera over the centre headrest. Finally, in order to get some light in the cabin, we set up the Canon 430EX II flash with my inflatable diffuser.

This photo (taken with my iPhone) shows the camera on the tripod, and the flash mounted in the hotshoe. As you can see, the iPhone camera really sucks in low-light conditions ! With the camera in the back seat, the setup was laborious - pull over, hop in the backseat, make adjustments, test shoot, refocus & start all over again !


In this side shot, you can see the shutter release cable dangling down from the camera body. Unfortunately, the cable is very short, so Pat had to hold her hand back behind her (out of the shot) to take the photos. She was an absolute trooper for staying in that position through 90 minutes and 270 shots !


The Photos

Here we are in the driveway. I knew I'd need to have some light inside the cabin, but we spent a few minutes figuring out the placement. At first, I thought off-camera would look good. I really didn't like how this looked at all - very unnatural !


Here is the first good shot - the cabin of the truck & passengers are reasonably lit, and in-focus. The outside is visible and somewhat blurry. The exposures were taken at 1 second, to enhance the feeling of motion.


This is actually one of my favorites. Most of the outside is blurry - look at the streaky headlights of the oncoming traffic ! But I was keeping pace with the car on our right, so it stayed reasonably in focus. This is the style I was after !


Man down ! Apparently, the rig wasn't as stable as I had hoped. I'm fortunate nothing got damaged as the tripod toppled over...


Occasionally, if we paused for too long, the flash would go into battery-saving mode, and not fire on the first shot. So we have about a dozen shots with no interior lighting.


This photo illustrates one of our challenges - how bumpy Calgary's roads are. The streak on the left is an oncoming car. The headlights waver up & down as the truck contends with the uneven road surface. That internal shake ruined quite a few shots entirely.


This photo was taken as we drove over the flyover into the downtown core. The exterior is blurred, giving the feeling of motion, while still focused enough to see where we are.


This is one of my favorite photos captured of the night's shoot. The passing traffic really conveys the feeling of movement. The viewer really feels like they are in the truck with us, driving through the city.


Lessons Learned

This was a complex shoot. I have to give a LOT of credit to my assistant, Pat. She not only fired off the 270 frames, but also had my iPad in her lap (out of sight of the camera) to validate we were getting the shots we wanted. The rigging of the camera in the backseat was OK - we really only toppled over twice in over 90 minutes of shooting. The shutter release cable is WAY too short - I think I am going to investigate a wireless option.

Over all, I am happy with the results. We captured about a dozen really cool photographs, which beautifully convey the feeling of motion. Let me know of you agree ! =D


Monday, March 24, 2014

Project365 - When You See It...

Introduction
I've been struggling to find my muse. There have been so many distractions, I'm afraid I can no longer really call this a 365 Project. Sigh... I must soldier on and keep shooting ! We are in the process of moving homes, and I was given the task of cleaning the jetted tub. You pour these crystals in, run the pumps, and they scour the internals of the pump and pipes. Then you drain the tub and refill, repeating the process to rinse the crystals out of the tub and it's internals.


The Setup

The ever-so-trusty Canon 60D, mounted with my Canon 24-105mm f/4 L lens. To brighten up the contrast, I mounted the hotshoe with a Canon 430EX II flash. I shot handheld, so I could get as close as I wanted.

The Photos

You can just make out the refraction of light around the drain. Do you see it ?


It may be a little less easy to discern in this photo...


I wanted to capture the vortex of water, created as it swirled down the drain. While the vortex wasn't so evident, the refraction of the light was !


Lessons Learned

This caught my eye & I decided to shoot. The challenge was that the water was SO clear, that I couldn't make out the funnel-shape I hoped. But the refraction of light bending the overall shape of the drain was wonderful ! Perhaps next time, I might try some light food colouring to the water.


Saturday, March 15, 2014

Project365 - The Boy Scout Motto

Introduction
I was on Facebook this morning, and a friend pinged me via the Messenger app. He was lamenting that a pair of bald eagles were roosting in a tree on his acreage, but he couldn't "find" his good camera body & long lens ! Of course, I felt for him - it sucks not being able to take the shot you want. But - how do you "lose" your equipment ?!?

On my way home from dropping Pat off, I came across an accident. The fire trucks and ambulances were long since gone, and the police were probably waiting for a tow truck to come cart the wreck away. Fortunately for me, I never leave the house without a camera with me.

The Setup

Nothing exciting, my Canon 60D with the trusty 24-105mm f/4 L lens. I shot handheld from across the hi way, as the constable didn't seem thrilled to see me !

The Photos

Bear in mind these were entirely spur of the moment. Couldn't really even call them Street Photography, as there were no people in the frames.

When I first came upon the scene, I had a moment where all I could think was "Whoops !". Truly, I hope nobody was hurt, but I may never know.


As you can see, the van tore up the guard rail before ending up on its side, up against the pole. I suppose we're lucky the pole didn't come down too !


Lessons Learned

The motto of the Boy Scouts is "be prepared", had I not had my camera with me, I wouldn't have been able to capture these photos.


Tuesday, March 11, 2014

Project365 - Studio Shoot

Introduction
I have been doing a lot more reading about how to set up a basic photography studio. It usually involves having multiple strobes, umbrellas or big soft-boxes, as well as a host of other tools. Being on a budget, I don't have a lot of those things. So I improvised !
The Setup
My Dad had an old Kodak Brownie Junior camera amongst his keepsakes. I thought it might make an interesting shoot - taking photographs of an antique camera ! Lacking a lightbox (although I have seen a YouTube video on how to make one inexpensively), I decided that a couple of flashes and some white paper carefully arranged on the dining room table might do the trick !
I mounted the Canon 24-105mm f/4 L lens onto my Canon 60D. I also used the Cactus v5 to trigger the flashes. One flash, at 1/4 power, was fitted with my inflatable diffuser & mounted on a small tripod. The other flash at 1/2 power was set to nuke the ceiling with bright light !
The Photos
I took quite a few photos, and the shoot lasted about 45 minutes as I played with my settings to get the sort of shots I wanted. Here are three of the best.
As you can see, the Brownie is a very simple camera, with a fixed lens. There's no focus or aperture settings here !


Note the Kodak name on the hand-strap ! At the bottom of the photograph, you can make out the winding mechanism for the film.


An interior shot highlights the lack of vanes on the shutter. It is a simple procedure to slide the shutter open & then closed. Really, there's not much to this beauty !


Lessons Learned
I enjoyed this shoot. I was faced with a number of challenges, including not being able to properly diffuse the light. But by bouncing one flash off the ceiling & using a diffuser on the other, I was able to properly light the subject without creating any harsh shadows. In a future entry, I want to build the lightbox I saw in the video, and see how well it works (or doesn't) .

Sunday, March 9, 2014

Project365 - Out and About

Introduction
Lately, I've been facing a bit of a block when it comes to my photography. There's lots of things I want to try, but either I don't have the equipment, or the conditions aren't right. As such, I have been procrastinating... But the best advice I read recently was to just simply go & shoot. Take photos every day, even if you end up discarding them later. So that's what I am going to try.
The Setup
The ever-so-trusty Canon 60D, paired with the de-facto Canon 24-105mm f/4 L zoom lens. All shot handheld, so no tripod or other setup required.
The Photos
This first photo was taken while I was waiting for Pat to be done work. The hospital she works at is a brand-new facility, with state of the art everything. They have even tried hard to work the landscaping into the surrounding area. I like the way they used this long grass to act as a screen around an outside patio area.


It is certainly a neat building, which incorporates all the latest technology to make it Leeds Platinum certified. I just like looking up at it !


Lessons Learned
In the movie Finding Nemo, the one character Dory (played by the wonderful Ellen Degeneres) had a catch-phrase - "Just keep swimming...". I have taken that over as "Just keep shooting..."
Hopefully, that as I find something new to shoot every day, it will help me find my muse. Stay tuned, you never know WHAT I will shoot next !

Saturday, March 8, 2014

Project365 - Clouds...

Introduction
Years ago, I worked with a Chief IT Architect who had an odd method of making requests: he would take his brow into his hand, close his eyes, and intone the things he wanted us to contemplate. My personal favorite was "Cloud. I'm thinking of cloud..." This Project365 entry is dedicated to Ron.
The Setup
My simplest setup - my trusty Canon 60D, with the Canon 24-105mm f/4 L mounted. All handheld and outdoors - no tripod or strobes.
The Photos
It's still winter in Southern Alberta, so the skies are a steel grey, and the clouds a stark white against it.
The sky was certainly many shades of grey, looking West over the foothills.

The clouds had remarkable contrast.


Just look at the gradient colour in the sky !


The best photo of the lot, in my humble opinion.


Lessons Learned
Great beauty is all around us, even when it isn't brightly coloured ! I'm pleased that I am learning to see this beauty, and share it with the world.

Project365 - Just Because...

Introduction
Every once in a while, I like to take photographs "just because". I don't always need to be experimenting with my gear, or trying to learn some kind of new technique. I love to photograph flowers - sue me ! I decided to change things up a bit this morning. Our dining room window had some beautiful light, and Pat's about-to-be-replaced bouquet of flowers were lapping up just that last little bit of sunshine. Most of the blooms were dead or dying, but this one orchid was hanging on for dear life !

The Setup
As always, I shot with my Canon 60D. To change things up a little, I mounted my Canon 17-40mm f/4 L wide-angle zoom lens. I shot handheld, as I like to get in nice and tight. At first, I was using a 12mm extension tube, but didn't get the results I had hoped for, so they were discarded pretty much as soon as I saw them ! Only the first photo below survived.

The Photos


Lessons Learned
None - I like lilies. Sometimes you just need to shoot for the joy of it. =D


Project365 - Red Sky in Morning

Introduction
While I like learning new techniques, I am also learning to apply techniques I have learned in new and different ways. This helps me grow my "creative" side. So this morning, I was driving south to meet my friend for coffees. Along the way I spied this church which was lit up & backlit by the sunrise. While I liked the colours, I knew that I would struggle with the low light. High dynamic range to the rescue !
The Setup
Nothing especially difficult here - my Canon 60D with the Canon 24-105mm f/4 L lens, all riding atop the Manfrotto tripod for stability. I set up the bracketing function, to capture +/- 1.3 stops. This will give me the dark, medium & light frames required. The scene was still, and the shutter speed was slow (about 1.5 seconds), so no need for setting up the AI-Servo to take three pictures at a time.
The Photos
The "darker" photo, at -1.3 EV

The "medium" photo, at 0EV


The "lighter" photo, at +1.3 EV


Now you'd think why bother with the under and over exposed photos. Isn't the "normal" (0EV) picture going to look the same ? In fact, it does not. I must confess I did post-process the final image slightly, but merely to crop the image. Here is the final product:

Lessons Learned
As you can see, the blues & pinks in the sky are much more vibrant. So while HDR didn't do much for capturing highlights & lowlights - it is often used in scenes where there is lots of shadow - it certainly helped capture the brilliant hues in the early morning sky. Further, the accent lighting on the building seems to "pop" more, adding a bit of drama to the photograph.
All in, I think that was an excellent way to use the technique to capture the photo I wanted. I am pleased with the end-result.

Sunday, March 2, 2014

Project365 - Almost Macro

Introduction
I must admit, I think macro photography is cool. For those unfamiliar with the term, it's the photographic method for taking pictures of very tiny objects. Imagine an 8X10 photograph of a bug's eye or a grain of rice. There are so many wondrous things around us, yet they are too small for the naked eye to see.

I had taken a few pictures (in this post) of Pat's tulips using an extension tube and my Canon 40mm f/2.8 prime lens. When I posted them, my new Facebook friend Dave asked me how I had captured them. When I explained about the extension tube(s), he inadvertantly gave me an idea - what if I used my Canon 70-200mm f/4 L telephoto lens ? I think an experiment is afoot !

The Setup

As I explained above, I mated my Canon 60D body with both a 25mm extension tube and my Canon 70-200mm f/4 L series telephoto lens. Then I mounted a Canon 430EX II on the body, and the body on my Manfrotto tripod. The whole rig is very front-heavy, as there is no additional stabilization on the lens itself. So I elected to use the shutter release cable as well - I didn't want any extra vibrations to ruin the shot !

The Photos

Pat "smuggled" a piece of coral back from Hawaii. It is wonderful and porous, although lacking in colour.


Here is a lantern, which pretty much fills the frame. The ideal for macro photography is to have a 1:1 ratio - between the sensor and the real size of the object. I think this is close...


Here's another view of the same lantern. I'm impressed by the minute detail in the metalwork.


Finally, a little perspective ! Look how tiny the lantern and coral are, when they're placed beside my iPhone on the mantle !


Lessons Learned

This was a fun little experiment. Strangely, because I was using a telephoto lens, I rather thought I would need to be much further away from the subject. Instead, I was barely 2 inches from the subject with the end of my lens ! Further, I learned to do a bit of "trial focus" work before deciding where to place the tripod.


Saturday, March 1, 2014

Project365 - Up Close and Personal !

Introduction
It's eleventy-beelion degrees below zero this weekend, so my photo shoots are being limited to in-studio for a couple of days. This means a lot more technical shoot, using more of my equipment. I have no willing subjects - teenagers sleep a remarkable amount, and the critters tend to get bored & wander away - so I'm shooting flowers. Yep, flowers - they don't give attitude, they don't wander off, and most importantly they are pretty to look at !

The Setup

I shoot with a Canon 60D, and today opted to shoot with my Canon 40mm f/2.8. It has a nice wide aperture, allowing lots of light onto the sensor. I mated it with a 12mm extension tube, to allow me to get a little closer. The whole rig was mounted on a Manfrotto tripod, and I chose to go off-camera with my Canon 430EX II flash using a pair of Cactus v5 triggers.

Here's what the shot started off as. Later I chose to add the external light to accentuate the blooms.


The Photos

Whoops ! I totally blew out the photo by setting the flash at full power with a wide (28mm) beam. Let's try that again ! (Neat effect, though)


Better, but I still have too much light at 1/8 power. It blows out the left side, while creating a strange white rim on the right side. Once more...


I dialled down the power to 1/32, but the flash is showing up in the corner. I didn't see it when I shot it, but it is definitely there !


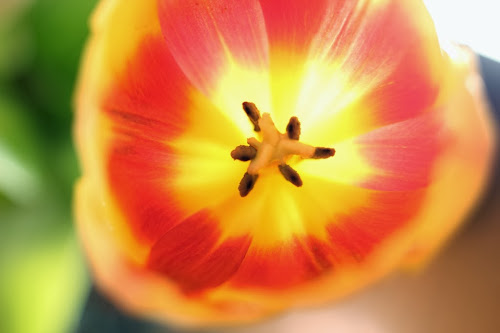
This is much better. The flash is low-power, and behind the bloom. It makes the flower positively glow ! I tried to balance the aperture so that the leaves in the background were blurry, while most of the bloom (the stamen is the focal point) is in-focus.


Lessons Learned

I am learning more about studio setup. Using my tripod, flash, triggers and shutter release to create visually interesting images is actually a lot of fun ! I wonder if Pat would let me convert one of the kids rooms into a studio ?!? =D